Monday, August 30, 2010

Summery Lemon Bars

"Do you know where the lemon trees flower?" - Johann Wolfgang von Goethe

Lemon bars are a quintessential summer dessert - no matter what time of year you make them! I discovered a recipe for them this past winter, when snow and ice was everywhere. They gave a delightful breath of summer, life and color to an otherwise dreary season.

What better time of year to make them than the season which they represent?


Recipe:

Makes: one 8" x 8" pan

Crust:
  • 1 cup all-purpose flour
  • 1/2 cup butter, softened
  • 1/4 cup powdered sugar
  • 1/8 tsp. salt
Filling:
  • 1 cup sugar
  • 2 eggs
  • 2 Tbsp. all-purpose flour
  • 2 Tbsp. lemon juice
  • 1/2 tsp. lemon zest
Garnish:
  • powdered sugar
  • lemon zest and/or fresh raspberries (optional)
 Preheat the oven to 350 degrees F., place the oven rack in the center of the oven. Butter or spray with cooking spray an 8" x 8" pan.
In the bowl of an electric mixer or with a hand mixer, cream the butter and sugar until fluffy. Add the flour and salt and beat until the dough just comes together. Press into the bottom of the pan and bake for about 20 mins. or until lightly browned. Remove from oven and allow to cool.
To make filling: with electric or hand mixer, beat sugar and eggs until smooth. Add the lemon juice and zest and stir to combine. Fold in the flour. Pour the filling over the crust and bake for about 20 minutes, or until the filling has set. Remove from oven and allow to cool completely.
Once cooled, cut into squares and dust with powdered sugar. If desired, garnish with extra lemon zest or with fresh raspberries.

Eat them under a flowering lemon tree with a friend.

Wednesday, August 25, 2010

Diaries of a Desperate Novice Bread Baker, part 2

"In the sweat of thy face shalt thou eat thy bread." - Genesis 3:19

Now I know why being pregnant is referred to as "having a bun in the oven."

Baking bread is (I imagine) very similar to having a child - time, preparation, patience and sacrifice are required. When I pulled my first-ever bread loaf out of the oven and realized it had come through successfully, I was about as happy and proud as a new mom :-)

The bread I made is a Universal Rustic Bread from this simply marvelous book.

The day before baking, I mixed a "Biga" pre-ferment dough to mix in with the regular dough for the loaf:


this is the Biga, after it had risen.


The day of baking, I got up at 8am to start getting the dough ready.

Bread dough, pre-rise


I covered it in a bowl and let it sit to rise for 4 hours.

bread dough, post-rise


Once it had risen, it was rolled in flour, shaped, and left to rise for another hour.

shaping the dough


While it was rising, I prepared my bread peel to receive the loaf. Once it had risen, I laid the loaf on the peel and placed the whole thing in a large plastic bag for a couple of hours to (you guessed it) rise some more.

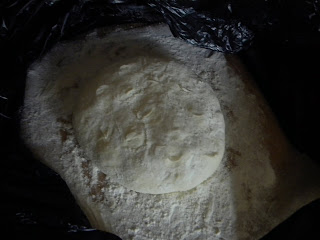
bread dough, third rise


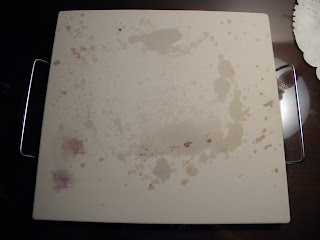
While it was on the final rise, I prepared the oven for baking - baking stone on top rack, jelly-roll pan on the rack immediately below it to hold water for steaming, close the door and preheat the oven. Finally, I slipped the dough onto the hot baking stone, poured water into the hot jelly-roll pan, and spritzed water into the oven and onto the loaf before closing the oven to bake - at around 5:30pm.

dough going into the oven


dough in the oven, being spritzed with water


Finally, it was time to take it out of the oven.

bread coming out of the oven


As my mom called to my dad when the bread was done, "you've got to see this - she's making bread like they do at Panera!" :-)

Bread cooling


Like I said, you feel like a new mother when it comes out right.

Inside of the bread


I plan to make three loaves total out of this batch. As I experiment with new breads, I will record the results here.

Monday, August 23, 2010

Diaries of a desperate novice bread baker, part 1

"A book of verses underneath the bough/ a jug of wine, a loaf of bread - and thou" - The Rubaiyat of Omar Khayyam

I've never baked bread before, and just recently decided that it was time to learn.With the help of this marvelous book, I plan to become a skilled, experienced bread baker. Homemade bread (done properly, of course) tastes better and is better for you, anyway.
I will be keeping a photographic diary of my bread-baking attempts. Using the above book, some specialized tools and my baker's intuition (as well as frequent, fervent prayer!), I hope to bring off my first ever bread loaf successfully.

So, here we go. Among other ingredients, utensils and things needed for this endeavor, I will need:
unbleached bread flour (King Arthur brand is my favorite)


Fresh and Instant Yeast


A Bread Peel - this one is $10.00 from Bed, Bath and Beyond


A Baking Stone - this is $20.00 by Oneida (yes, I have used it once or twice)


An Apron - this one is made of heavy Denim, my favorite for baking


Now to head to the kitchen!

To be continued...

Friday, August 20, 2010

Vive le France baked brie

"How do you govern a country that has 246 varieties of cheese?" - Charles de Gaulle

Good question, which is why France will never be a world power in anything besides delicacies - like Brie. Make no mistake - this baked brie will have you marching on your stomach like Napoleon's army before you know it.


Recipe:

You will need:
  • 1 sheet of frozen puff pastry
  • 1 egg
  • water
  • 1/2 cup apricot preserves
  • 1/2 cup Dijon mustard
  • 1/3 cup dried cranberries
  • 1/3 cup chopped almonds
  • 1 brie wheel
 Thaw the puff pastry sheet until it's easy to handle. Heat the oven to 400 degrees Fahrenheit. Mix egg and water in a bowl.
Unfold the puff pastry sheet on a lightly floured surface. Roll into a 14 inch square, but be sure it's not too thin. Cut off the corners to make a circle. Spread the preserves on the circle to within 1 inch of the edge. Spread the mustard on top of the preserves in the same way. Sprinkle the cranberries and almonds on top of the mustard. Place the cheese wheel in the center of the circle. Brush the edge of the circle with egg wash. Fold 2 opposite sides over the cheese, one at a time. Fold the remaining two sides onto the cheese. Press the edges to seal. Place the brie seam-side down on a baking sheet lined with parchment paper. Decorate the top with the pastry scraps, using egg wash to secure the pieces, if desired. Brush the entire brie with egg wash.
Bake for 20 minutes, or until the pastry is golden. Let stand 1 hour before serving.

Vive le Brie!

Wednesday, August 18, 2010

Betsy Trotwood's bulky triangle shawl

"When I had bathed, they...enrobed me in a shirt and a pair of trowsers belonging to Mr. Dick, and tied me up in two or three great shawls. What sort of bundle I looked like, I don't know, but I felt a very hot one." - David Copperfield, Charles Dickens

If you live in a colder climate, and wish you had a nice heavy shawl to wrap yourself in like David, but aren't very skilled at knitting (or you just want a pattern that's hassle-free), you can't go wrong with this Triangle Shawl pattern.


Hint: it's a good idea to make this around the beginning of fall, so that you have it for when the cold weather sets in.

You will need:
  • About 640 yards of bulky yarn (I recommend yarn from the Brown Sheep Company)
  • Circular knitting needles, U.S. size 15
  
Directions:

Cast on 2 stitches. Knit one row and begin increasing as follows: knit into the front loop, and then into the back loop of the same stitch. Turn, knit to last stitch, and increase the same way as before. Continue this pattern until there are 120 stitches. Bind off very loosely.
With the remainder yarn, attach a fringe along the two shorter edges (see picture).

(If you don't understand any part of the pattern, you can go here for free knitting tutorial videos.)

Tie around yourself, or any long-lost nephews that turn up on your doorstep!

Monday, August 16, 2010

Variation on a Theme: Cheddar Cayenne Chives Biscuits

"Variety is the spice of life" - American Saying

How true this is. While visiting Texas for a friend's wedding, I tasted some spicy cheese biscuits at a restaurant. When I got home, after a brief perusal of Allrecipes.com, I pulled on my apron and headed to the kitchen. The result was this tangy cheese biscuit recipe:


Recipe:
Makes: about 55 biscuits

You will need:
  • 1 cup butter, softened
  • 3 cups shredded sharp cheddar cheese
  • 2 cups all-purpose flour
  • 1/4 cup chopped chives (dried work just as well)
  • 1/2 tsp. salt (optional)
  • 1/2 tsp. cayenne pepper
  • 1 tsp. paprika
  • 1/4 tsp. garlic powder
  • 2 cups rice crispy cereal
 In a large bowl, mix butter and cheese until well blended. Stir in flour, chives, cayenne, paprika and garlic powder until thoroughly mixed. Stir in cereal. Divide into 4 parts, and roll each part into 6" logs. Wrap in plastic wrap and refrigerate for 1 hour.
Preheat oven to 325 degrees Fahrenheit. Unwrap the logs and cut into slices about 1/2 to 1 inch thick. Place on an ungreased cookie sheet lined with parchment paper.
Bake for 20-25 minutes until the edges are crispy and very slightly brown.

Not spicy enough? adjust the amount of spice you put in accordingly. (As I found out, Texans love their food on the spicy side :-))

Enjoy!

Friday, August 13, 2010

Summer's Pride Cocktail Napkins

"How sweet I roamed from field to field/ And tasted all the summer's pride." - How Sweet I Roamed, William Blake

 Summer is the perfect time to have parties with cold drinks. And pretty homemade cocktail napkins give a perfect finishing touch.

These cocktail napkins come from the July/August 2010 issue of Victoria Bliss magazine.

Here is a picture of the napkins I made:


Directions:

You will need:
  • Cotton fabric (about 1 yard makes 1 dozen napkins, with a little left over)
  • Scissors
  • 1/2 inch double-fold bias tape in complementing color
  • Needle and thread (or, if you have a good eye and a deft hand, a sewing machine)
  • Straight pins
Cut fabric into 10-inch squares. Baste or pin bias tape to the edges, sew.

Provide at any event where tasting summer's pride is in occurrence.

Wednesday, August 11, 2010

Anne of Green Gables Berry Cordial

"I love bright red drinks, don't you? They taste twice as good as any other color." - Anne of Green Gables, L. M. Montgomery

Nothing is quite as refreshing or better tasting than homemade berry cordial. This recipe comes from the Anne of Green Gables Cookbook by Kate Macdonald. It was one of my favorite recipes to make with my mom when I was little. It's also good to make during (or store until) the winter for sore throats.

the dark cordial is blackberry, the light one is strawberry.


 Ingredients:
  •  2 packages of frozen unsweetened raspberries or blackberries
  • 1 1/4 cup sugar
  • 4 cups boiling water
  • 2 lemons
Utensils:
  •  Large saucepan
  • Measuring spoons
  • Wooden spoon
  • Potato masher
  • Wire strainer

Directions:
Put the unthawed berries into the saucepan and add sugar. Cook over medium heat, stirring once in a while, for 20-25 minutes, until all the sugar has dissolved. With the potato masher, mash the berries and syrup thoroughly. Pour mixture through the strainer, making sure you extract all the juice. Discard the pulp. Squeeze the 2 lemons and strain the juice. Add it to the berry juice. Boil 4 cups of water and add it to the berry juice. Let the cordial cool before serving.

A nice storing idea is to find a store or market that sells French Lemonade in the glass bottles with attached stoppers. After the bottles are empty, wash them in hot water and dish soap and rinse thoroughly (peel off the labels as well). Using a funnel, carefully pour the cordial into the bottles. You can double the recipe, which fills about three lemonade bottles.

Enjoy, and be careful not to mistake it for currant wine, like Anne and Diana!

Monday, August 9, 2010

Louisa Ellis' favorite apron pattern

"Louisa took off her green gingham apron, disclosing a shorter one of pink and white print... [she] rose and took off her pink-and-white apron. Under that was still another - white linen with a little cambric edging on the bottom." - A New England Nun, Mary E. Wilkins Freeman

If you adore aprons as much as I do, and nearly as much as Louisa did, you'll love this apron pattern. The website has pictures to go along with the instructions, and you can adjust the length to your preference.

Here's mine - it was made long on purpose, to protect my pants from flour, dish water, etc.

the apron


close-up of fabric

 Here is the link.

Make as many as you wish. Wearing them all at once is up to you, but not recommended. :-)

Friday, August 6, 2010

A.A. Milne's Proper Tea Cozy

There are two quotations for this post - the first for obvious reasons, and the second because I just love it:

"A Proper Tea is much nicer than a Very Nearly Tea, which is one you forget about afterwards." - A. A. Milne

"Never trust a man who, when left alone in a room with a tea cozy, doesn't try it on." - Billy Connolly

This reversible homemade tea cozy will guarantee a Proper Tea in every sense of the word.


Here is the link to the pattern.

Tie it on your favorite teapot and have a memorable tea. Trying it on you is optional :-)

Thursday, August 5, 2010

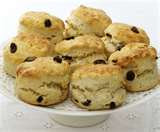
Henry James Tea Scones

"Under certain circumstances there are few hours in life more agreeable than the hour dedicated to the ceremony known as afternoon tea" - The Portrait of a Lady, Henry James

And there are fewer tea pastries more delightful than authentic, English tea scones with clotted cream and strawberry jam.


Tea Scone Recipe 
Makes about 24

Ingredients:
  • 1 lbs. butter
  • 5 1/4 cup all-purpose flour
  • 1 cup sugar
  • 2 Tbls. and 2 Tsp. baking powder
  • 1 tsp. salt
  • 4 eggs
  • 1 cup heavy whipping cream
  • 1 cup whatever fruit desired (currants are usual, but I've made these with 1/2 cup dried cherries and 1/2 cup chocolate chips - to die for!))
  • 1 extra egg, and water (for egg wash)
Mix dry ingredients together in a medium to large mixing bowl. Add cold butter and cut into flour. (There are other ways to do this, but I usually cut the sticks of butter into small squares, add them to the dry ingredients, then mix it in with my fingers until the mix is crumbly)
In a small to medium mixing bowl, mix the wet ingredients together, then add to the dry ingredients. Mix carefully until dough forms - do not over-stir!
Preheat oven to 350 degrees Fahrenheit
Add the dry fruit and mix in thoroughly. Roll out on a very lightly floured surface, and cut scones using a round cookie cutter (medium size). Lay rounds on a baking sheet, evenly spaced.
In a small bowl, beat the extra egg with the water. Brush the tops of the scones with the egg wash - be careful not to get them too soggy!
Bake the scones for approx. 20 minutes, or until the tops are golden brown.
They can be stored in an airtight container in a cool dry place for about a week

Serve at a tea party with friends, or keep to have with a cup of tea and a Henry James or Jane Austen novel on a rainy day.

Wednesday, August 4, 2010

Madame Defarge's chunky knitted beret

"He [the countryman] looked at no one present, and no one now looked at him; not even Madame Defarge, who had taken up her knitting, and was at work." A Tale of Two Cities, Charles Dickens

Madame Defarge has really given knitting a bad name - those who don't understand it look at it askance, some linking it in their minds with revolution and bloodshed, thanks to Charles Dickens and his notorious, bloodthirsty femme fatale. But really, knitting is fun, absorbing and often theraputic.

Especially when you mix it with French Berets. I've made several knitted berets in the past year, and they are incredibly simple to make, and lots of fun to wear.

Here are a couple of my results (note: I do sell on Ebay. The green one has been sold, but I still have the black set. Will be listing some more pieces for sale in the fall. My Ebay ID: aeknittingly)

black knitted beret with matching scarf


Sea foam green beret


The pattern I used comes from this blog

In the search field, type "super easy & fast hand-knit chunky beret" and click on the link that comes up that matches those words.

Follow the directions.

Once you've made the beret and cast your stitches off, the beret doesn't quite lay flat, like traditional berets should. To fix this problem, you must "block" the beret.

You will need:
  • cool water
  • a round, standard-sized dinner plate (about 10" or so in diameter)
*note: If you are using 100% wool, or a mostly-wool mix yarn, you do NOT want to put it in hot water, as shrinking can occur.

Take the beret and get it completely saturated with cool water. Gently squeeze (do NOT wring) most of the water out until there is practically no dripping.
Take the dinner plate, and carefully slide it inside the beret, so that the top of the hat lies flat against the serving side of the plate, and the rim of the beret lies against the bottom of the plate. Make sure there are no large wrinkles, and that the beret is lying completely flat on both sides.
Sit the beret/plate on a hard, water-resistant surface that will encourage drying, in a place where it is unlikely to be disturbed, at normal room temperature. Check on it every few hours or so to turn it over to give both sides a chance to dry evenly (this may take a few days). Once it is almost completely dry, take it off of the plate and let it finish air drying on its own. 

Vive le Beret! (just don't start any blood-thirsty revolutions when you wear it :-))

Tuesday, August 3, 2010

Lady Bracknell's Cucumber Tea Sandwiches

Algernon: (Picking up empty plate in horror) "Good Heavens! Lane! Why are there no cucumber sandwiches? I ordered them specially."
Lane: (Gravely) "There were no cucumbers in the market this morning, sir. I went down twice"
Algernon: "No cucumbers!"
Lane: "No, sir. Not even for ready money"
 -- The Importance of Being Earnest, Oscar Wilde

There's a reason the cucumber sandwich plate was empty by the time Lady Bracknell arrived for tea...


Lady Bracknell's open-face cucumber tea sandwiches
Makes: However many you need. One loaf of 40 bread slices makes 80 sandwiches
  • One loaf of thin-sliced, white bread
  • 1-2 English Cucumbers
  • Plain cream cheese (Philadelphia brand Whipped cream cheese works best)
  • Parsley (optional)
  • salt and pepper
*optional: Use a vegetable peeler to peel the green skin off the cucumbers before starting.

With a sharp paring knife, cut the entire cucumber into very thin slices, as transparent as possible. Set aside.
Spread each piece of bread with a thin layer of cream cheese on one side. Take a bread knife and cut each slice of bread in half, either straight up and down to make two rectangles, or diagonally to make two triangles. 
Take the cucumber slices and lay on as many as needed to cover the surface of the slice. Lay sandwich on a platter or plate. Repeat until you have as many sandwiches as you need.
Take the salt shaker and shake a very light layer over all the sandwiches on the platter. Repeat with the pepper shaker.Garnish with parsley if desired.
Serve immediately.
*note: it's best to make these right before serving - storing in the refrigerator can make them limp and soggy.

Enjoy with your favorite brand of tea! And no, holding your pinky finger in the air is NOT well-mannered ;-)

Monday, August 2, 2010

Lady Macbeth's favorite dishrag

Lady Macbeth: "Yet here's a spot... Out, damn'd spot! Out, I say! - One; Two;" - Macbeth Act 5, Scene 1.

Obviously, Lady Macbeth was without this knitted dishrag:

Measuring 7" by 7", this little beauty will clean any spots on dishes you've got. It's quite resilient and durable, and can be tossed in with the laundry to clean.

You will need:
  • a 100% cotton yarn in your favorite earth-tone color (i.e. sage green, brown, dusty gold, etc.)
  • U.S. size 6 knitting needles
  • Size I/9 (5.50 mm) crochet hook
  • Scissors
  • measuring tape
Cast on 40 sts.
Knit in regular garter stitch until square measures 7" long, and is even on all sides. Bind off.
With crochet hook and same color yarn (or, to provide a bit of contrast, choose another cotton yarn in a different color), crochet an edge around all four sides only once, cut yarn and tie off. Weave in ends.
A little puckering around the finished edge is normal.

Now go attack the pots and pans with all the subtlety and force of Burnam Wood coming to Dunsinane ;-)

Welcome to Peggotty's corner!

Welcome to my new blog, Peggotty's Corner! I graduated from college with a B.A. in English last year, and have spent my time since then teaching literature to young 'uns and sharpening my homemaking skills. Now I've decided to start a blog that incorporates both - literature and homemaking.

I named it after Peggotty, the nurse, housekeeper and friend of the hero in Charles Dickens' novel David Copperfield. While young David is being driven to stay with friends at the seaside, the carriage driver Mr. Barkis eats some of Peggotty's little cakes that she sent along for the journey. After eating one, he asks David to pass on the message to her that "Barkis is willin'", the 19th century carriage-driver equivalent of popping the question :-)

Even though I'm unmarried as yet, and have no idea where I'll end up in the course of my life, it's my intention to become a remarkable homemaker and cook. Keeping a beautiful home and being able to cook devastatingly good food are skills I want to develop and use all my life to bring hospitality to those around me. If you have these interests at heart too, then you're among friends :-)

God bless you, and I hope you find my posts inspirational and helpful!